Integrating with SparkPost
Getting Started
This document will help you easily integrate your QuickEmailVerification account with SparkPost. That will help you easily verify your recipient list and improve email deliverability.
To use this integration you'll need
- Your Account credentials of QuickEmailVerification
- Your SparkPost API key
If you don't have QuickEmailVerification account, you can get your free account by signing up here. Once you sign up, you get 100 free credits every day for email verification.
Once you are ready with your account credentials of QuickEmailVerification and SparkPost, you can start the integration process.
Connect with SparkPost
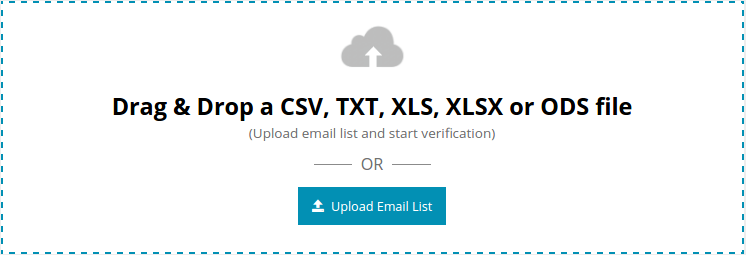
Firstly, log into your QuickEmailVerification account. After logged in you will see the following screen. Click the Upload Email List button.
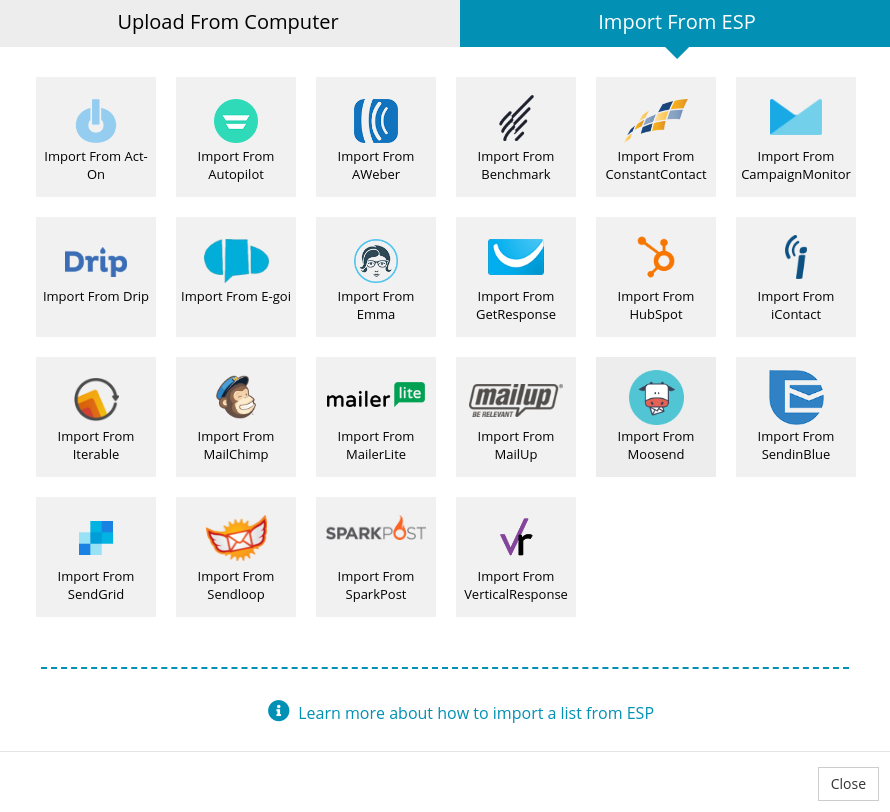
You'll find the following two tabs on the next screen:
- Upload From Computer
- Import From ESP
As we are going to import recipient list for SparkPost, click on Import From ESP. The next screen will show listings of the different ESPs we have partnered with. Select Import from SparkPost.
You are about to enter the SparkPost log in window. Enter you SparkPost API key.
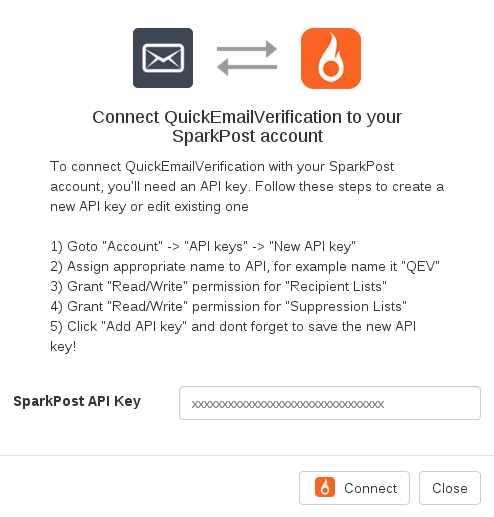
At QuickEmailVerification, your privacy is very important to us. Your SparkPost credentials are used only to communicate with your SparkPost account. They are not stored anywhere by QuickEmailVerification.
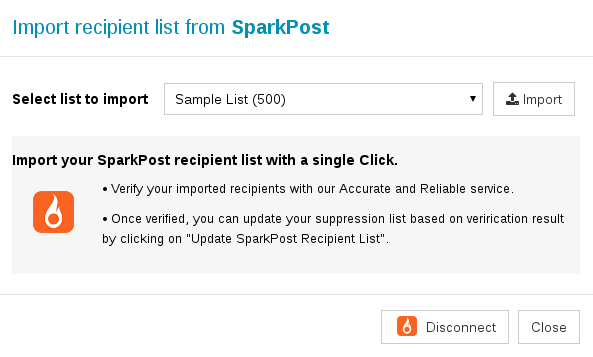
Import Recipient List from SparkPost
After you are successfully logged in, you will see the next screen having recipient list in a drop down menu. Select the recipient list that you'd like to verify. For our purpose, we have chosen 'Sample List'. Click Import.
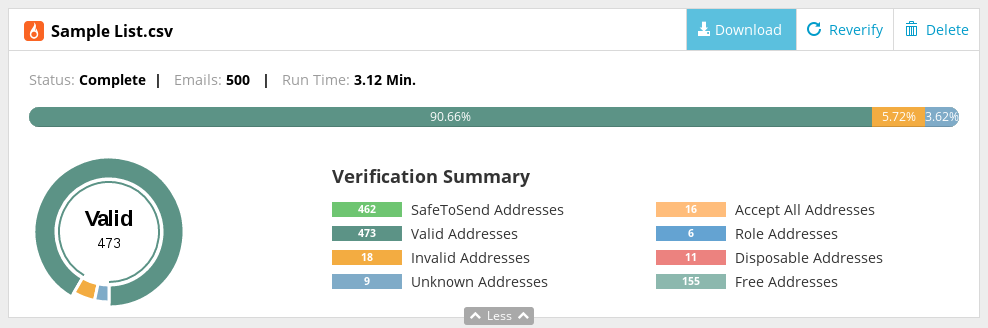
Now your list is ready for the verification process. To start the verification process, click on Start button. This process will take a few minutes, depending on the size of the recipient list.
Feel free to logout and carry out other activities once the start button is clicked. It will start verification process in background so logging out will not interrupt the verification process.

Suppress your SparkPost Recipients
After the verification process is successfully completed, you will receive an email telling you the verification process is complete. Now your list is ready for next stage.
If you had logged out from your QuickEmailVerification account, you will need to log in.
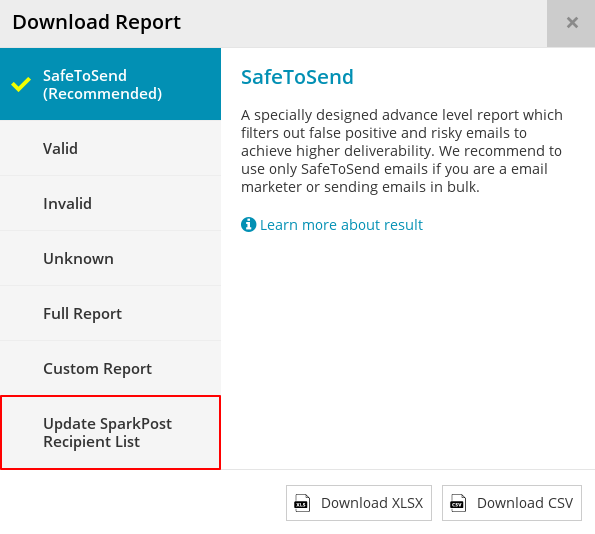
You'll notice there's a button titled Download.
Clicking on this button will open a modal box. From the modal box, choose Update SparkPost Recipient List option to update your recipient list.
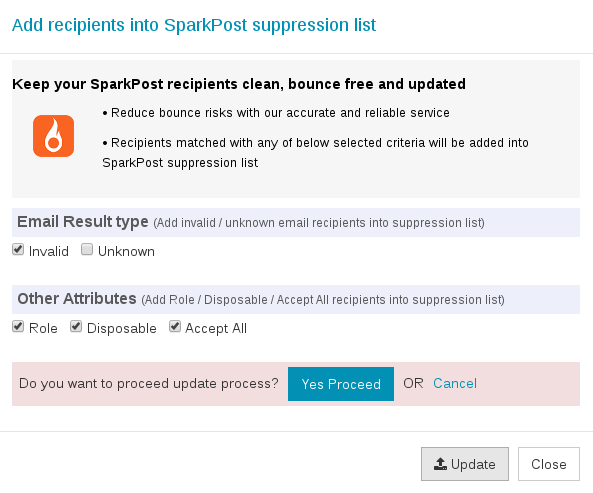
Now you are in important screen. You'll see there are five checkboxes: Invalid, Unknown, Role, Disposable and Accept All. Also some checkboxes are selected by default. While you are free to check or uncheck checkboxes as per your need, we recommend you do not change the default settings.
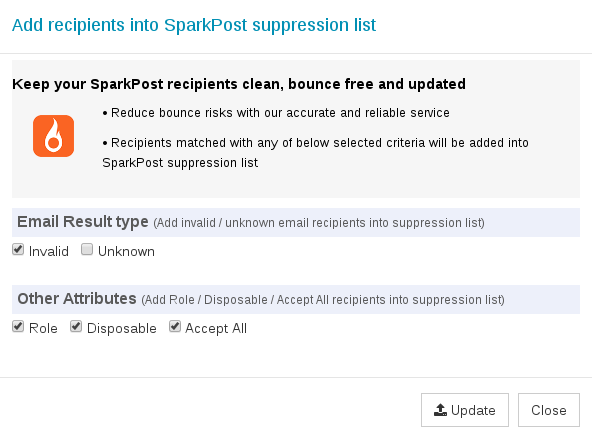
Note that, email addresses associated with boxes that are checked will be added into the Suppression List. It means that those email addresses will not receive any email from your SparkPost campaigns in future.
After that, click on Update. You will again be asked for confirmation to update your recipient list. Click Yes Proceed.
Once the process is successfully completed, your recipient list will be updated. You will receive an email on your registered email address telling your suppression list has been updated.
That's it!
As you just saw, the process to clean and update your recipient list is very easy. The cleaned recipient list may be used for your future campaigns. This will give your increased deliverability of your emails and practically zero bounces.
Even though the process is quite simple, if you face any problems feel free to contact us on support@quickemailverification.com. We'll be glad to help!